前言
市面上那么多输入法为什么还要折腾一个新的输入法?
许多年前有爆出输入法泄漏隐私的问题,一些数据没有经过加密传输。
这些想想都让人后怕。经过一段时间的摸索,逐步上手了 RIME ,因为 RIME 并不是那么容易上手,所以我把摸索的一些经验写成文章,希望能帮助到想使用 RIME 的伙伴。
安装
RIME 在各个平台都有提供,并且叫法不一样, Windows 下叫 小狼毫 、 Mac 下叫 鼠鬚管 、 Linux 下叫 中州韻 。本文以 Mac 为例讲述在 Mac 上使用。
Mac 平台使用如下命令进行安装
1
|
brew install squirrel --cask
|
基本概念
rime 把配置文件分为共享资料和用户资料。
共享资料
共享资料是软件自带的,包含预设方案,对用户只读。 Mac 共享目录在 /Library/Input Methods/Squirrel.app/Contents/SharedSupport 。
修改了这里的文件会影响软件的升级。所以一般我们不会去修改这个目录下的文件。
用户资料
用户资料在 ~/Library/Rime 下,用户资料有以下几个文件
- default.yaml 全局设定
- squirrel.yaml 发行版设定
- 输入方案.schema.yaml 输入方案指的是明月拼音、小鹤双拼。如果你用的是明月拼音这个文件就是
luna_pinyin.schema.yaml
这些都是默认的配置,如果我们要修改,需要在文件类型前面加上 custom 例如 default.custom.yaml
切换输入方案
RIME 会内置一些输入方案,比如明月拼音。你可以通过 F4 来切换你想要的。
外观
如果我们需要修改输入法的外观,首先需要创建 ~/Library/Rime/squirrel.custom.yaml
 1
 2
 3
 4
 5
 6
 7
 8
 9
10
11
12
13
14
15
16
17
18
19
20
21
22
23
24
25
26
27
28
29
30
31
32
33
34
35
36
37
38
39
40
41
42
43
44
45
46
47
48
|
patch:
  show_notifications_when: appropriate  # 状态通知,适当,也可设为全开(always)全关(never)
  "style/display_tray_icon": true
  "style/horizontal": true #横排显示
  "style/font_face": "Microsoft YaHei" #字体
  "style/font_point": 13 #字体大小
  "style/inline_preedit": true # 嵌入式候选窗单行显示

  "style/layout/border_width": 0
  "style/layout/border": 0
  "style/layout/margin_x": 12 #候选字左右边距
  "style/layout/margin_y": 12 #候选字上下边距
  "style/layout/hilite_padding": 12 #候选字背景色色块高度 若想候选字背景色块无边界填充候选框,仅需其高度和候选字上下边距一致即可
  "style/layout/hilite_spacing": 3 # 序号和候选字之间的间隔
  "style/layout/spacing": 10 #作用不明
  "style/layout/candidate_spacing": 24 # 候选字间隔
  "style/layout/round_corner": 0 #候选字背景色块圆角幅度

  "style/color_scheme": devbins # 选词皮肤
  preset_color_schemes:
    devbins:
      name: "devbins"
      author: "@devbins"

      horizontal: true                                  # 水平排列
      inline_preedit: true                              # true: 单行显示,false: 双行显示
      candidate_format: "\u2005%c\u2005%@\u2005"        # 用 1/6 em 空格 U+2005 来控制编号 %c 和候选词 %@ 前后的空间。

      corner_radius: 5                                  # 候选条圆角
      border_height: 1                                  # 窗口边界高度,大于圆角半径才生效
      border_width: 1                                   # 窗口边界宽度,大于圆角半径才生效
      back_color: 0xFFFFFF                              # 候选条背景色
      border_color: 0xD77800                            # 边框色
      font_face: "STKaiti"                              # 候选词字体
      font_point: 19                                    # 候选字词大小
      text_color: 0x000000                              # 高亮选中词颜色
      label_font_face: "SimHei"                         # 候选词编号字体
      label_font_point: 18                              # 候选编号大小
      label_color: 0x9e9e9e                             # 预选栏编号颜色
      candidate_text_color: 0x000000                    # 预选项文字颜色
      text_color: 0x000000                              # 拼音行文字颜色,24位色值,16进制,BGR顺序
      comment_text_color: 0x999999                      # 拼音等提示文字颜色
      hilited_text_color: 0x000000                      # 高亮拼音 (需要开启内嵌编码)
      hilited_back_color: 0xffffff                      # 已选择字右侧拼音 背景色
      hilited_candidate_text_color: 0xFFFFFF            # 第一候选项文字颜色
      hilited_candidate_back_color: 0xD77800            # 第一候选项背景背景色
      hilited_candidate_label_color: 0x9e9e9e           # 第一候选项编号颜色
      hilited_comment_text_color: 0x9e9e9e              # 注解文字高亮
|
配置输入法
我这里使用的是明月拼音,就以明月拼音为例。明月拼音的的配置在 ~/Library/Rime/luna_pinyin.custom.yaml
 1
 2
 3
 4
 5
 6
 7
 8
 9
10
|
patch:
  switches:                   # 注意缩进
    - name: ascii_mode
      reset: 0                # reset 0 的作用是当从其他输入法切换到本输入法重设为指定状态
      states: [ 中文, 西文 ]   # 选择输入方案后通常需要立即输入中文,故重设 ascii_mode = 0
    - name: full_shape
      states: [ 半角, 全角 ]   # 而全/半角则可沿用之前方案的用法。
    - name: simplification
      reset: 1                # 增加这一行:默认启用「繁→簡」转换。
      states: [ 漢字, 汉字 ]
|
修改默认行为
有时候我们想修改候选词的数量,或者按下 Shift 之后能够把字符上屏,这些在默认中是没有的,所以我们要更改这些行为。
创建 ~/Library/Rime/default.custom.yaml 加入如下配置
 1
 2
 3
 4
 5
 6
 7
 8
 9
10
11
12
13
14
15
|
patch:
  "menu/page_size": 7

  "translator/enable_user_dict": true
  "translator/enable_encoder": true #是否开启自动造词〔仅table_translator有效〕
  "translator/encode_commit_history": true #是否对已上屛词自动成词〔仅table_translator效〕
  "translator/enable_sentence": true #是否开启自动造句

  ascii_composer/good_old_caps_lock: true
  ascii_composer/switch_key:
    Caps_Lock: noop
    Shift_L: commit_code
    Shift_R: noop
    Control_L: noop
    Control_R: noop
|
这样一次就会显示7个候选词了,并且输入中文的时候按下 Shift_L 会把当前输入的符号自动上屏,并且切换到英文输入法,这就和我们常用的输入法一致了。
词库
一个输入法好不好用,跟输入法里面的词库有莫大的联系,由于内置的词库并不是很丰富,所以我们需要添加一些第三方词库。
下载词库
1
2
|
cd ~/Library/Rime
curl -O -L https://github.com/outloudvi/mw2fcitx/releases/download/20220218/moegirl.dict.yaml
|
词库也需要下载到用户共享资料目录中
配置词库
下载好了,我们需要告诉明月拼音去哪里加载,所以还需要在 ~/Library/Rime/luna_pinyin.custom.yaml 中加入词库的位置
1
2
3
|
patch:
  # ...
  "translator/dictionary": luna_pinyin.extended
|
接着创建 ~/Library/Rime/luna_pinyin.extended.dict.yaml 并加入如下文件
1
2
3
4
5
6
7
8
9
|
#  luna_pinyin.extended.dict.yaml
---
name: luna_pinyin.extended
version: "2022.05.04"
sort: by_weight
use_preset_vocabulary: true
import_tables:
  - luna_pinyin
  - moegirl
|
在这个文件中我们把刚刚下载好的 moegirl 放到了 import_tables 中的末尾,这样就可以使用了。
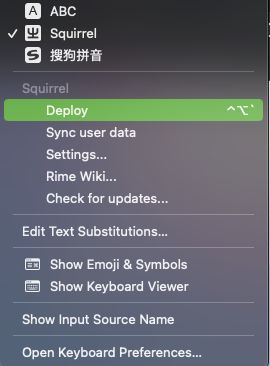
做完这些之后还要部署一下,告诉 rime 配置有更新,这样才会生效。
效果

参考