在 Android 中使用第三库有两种方式,第一种是把 jar 文件放到 libs 目录下作为 library 引用,第二种需要开发者把编译好的 jar 包上传到类似 maven 这种中央仓库,然后在项目中添加依赖就可以了。
使用 jcenter 来管理第三方库在升级版本时非常方便,只需要更改版本号就可以了。不然每次版本升级都需要到指定的地方下载下来,然后替换旧版本,这样就非常麻烦。但是 maven 是所有人员都可以访问的,有一些公司的项目是不能公开,所以需要我们搭建自己的 maven 仓库,这就是本文要讲的。
<!–more–>
安装
安装这里说多了都是累,最开始我创建好了目录没有改变目录权限,后面运行一直都是失败的。但如果不挂载目录就可以正常运行。找了好久才找到原因,还一直误以为是挂载的不对。
1
2
|
mkdir ~/nexus-data && sudo chown -R 200 ~/nexus-data # Mac 和 Windows 中不需要修改权限,只需要创建目录就好
docker run -d -p 8081:8081 --name nexus3 -v ~/nexus-data:/nexus-data sonatype/nexus3
|
创建一个仓库
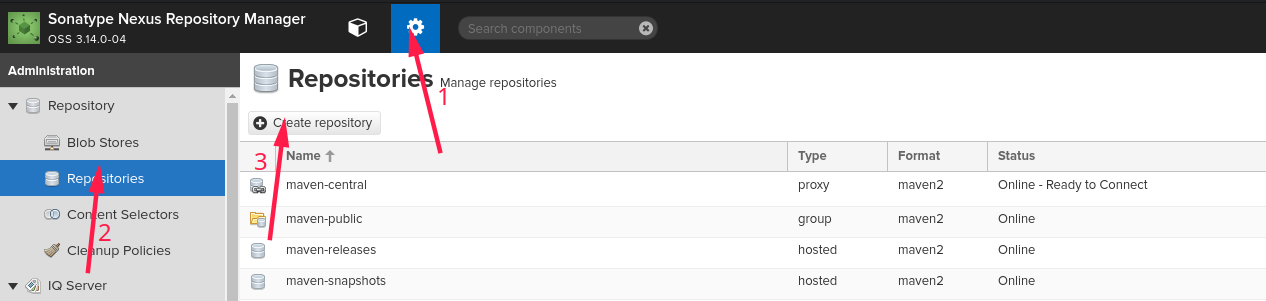
nexus 搭建好了,需要等个一小会。启动好了后,点击右上角的登录,输入账号密码登录。默认账号是 admin 密码是 admin123 。
接着跟着下图新建仓库
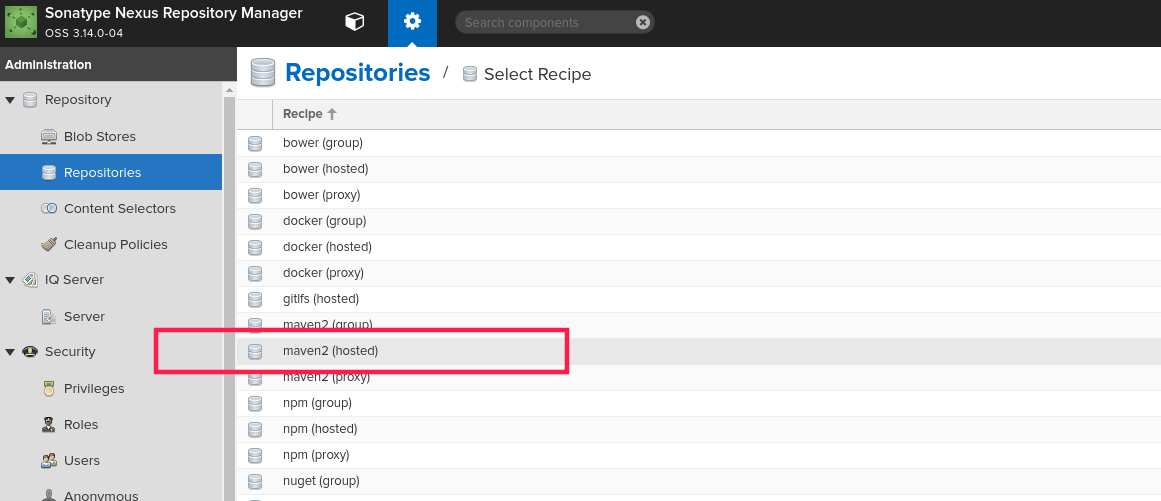
 这里选择 maven2(hosted)
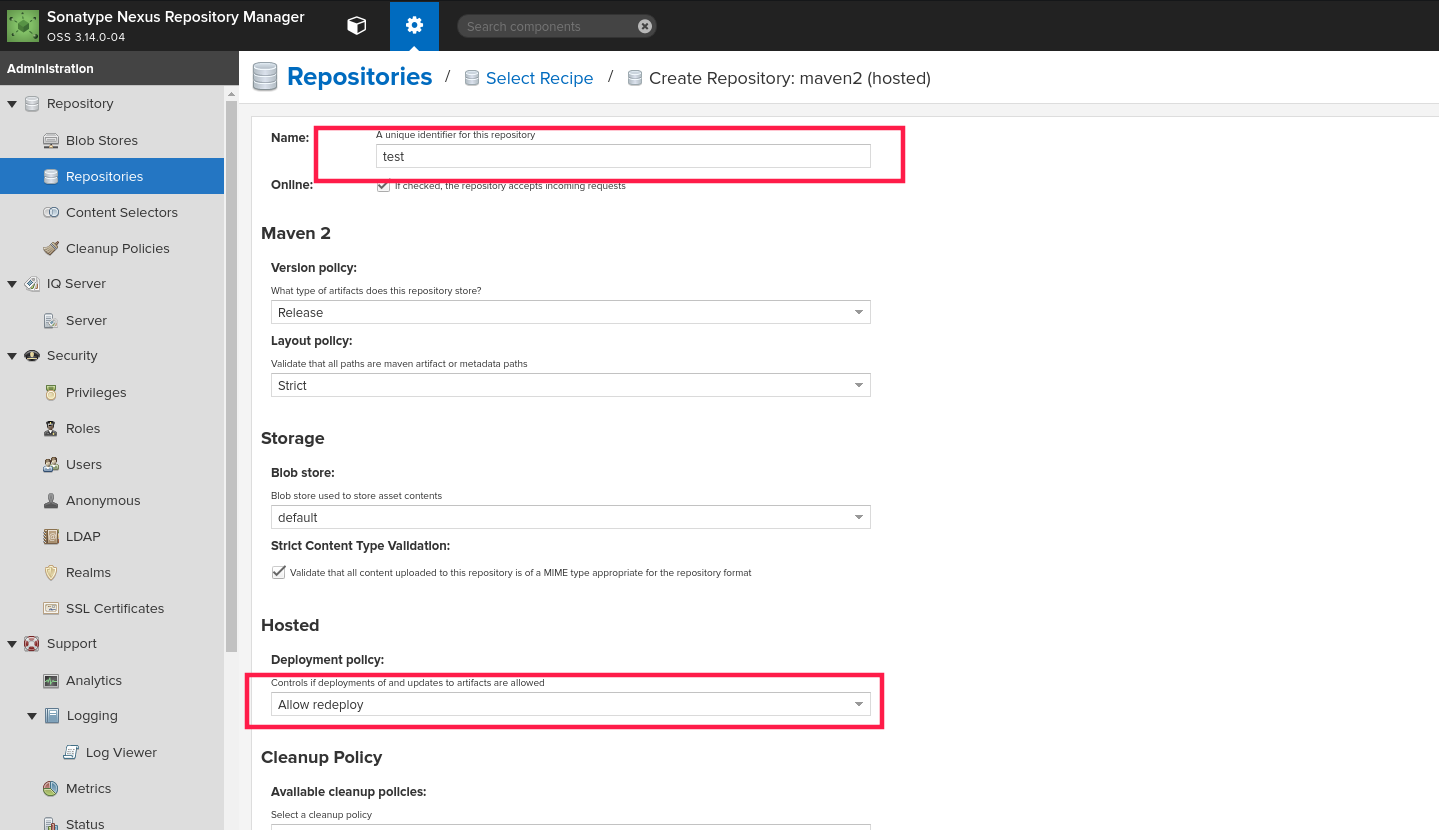
 接下来配置仓库的信息,主要是填写仓库的名字和配置仓库可以被重新部署
 到这里配置就差不多了,我们点击 copy 获取仓库的地址

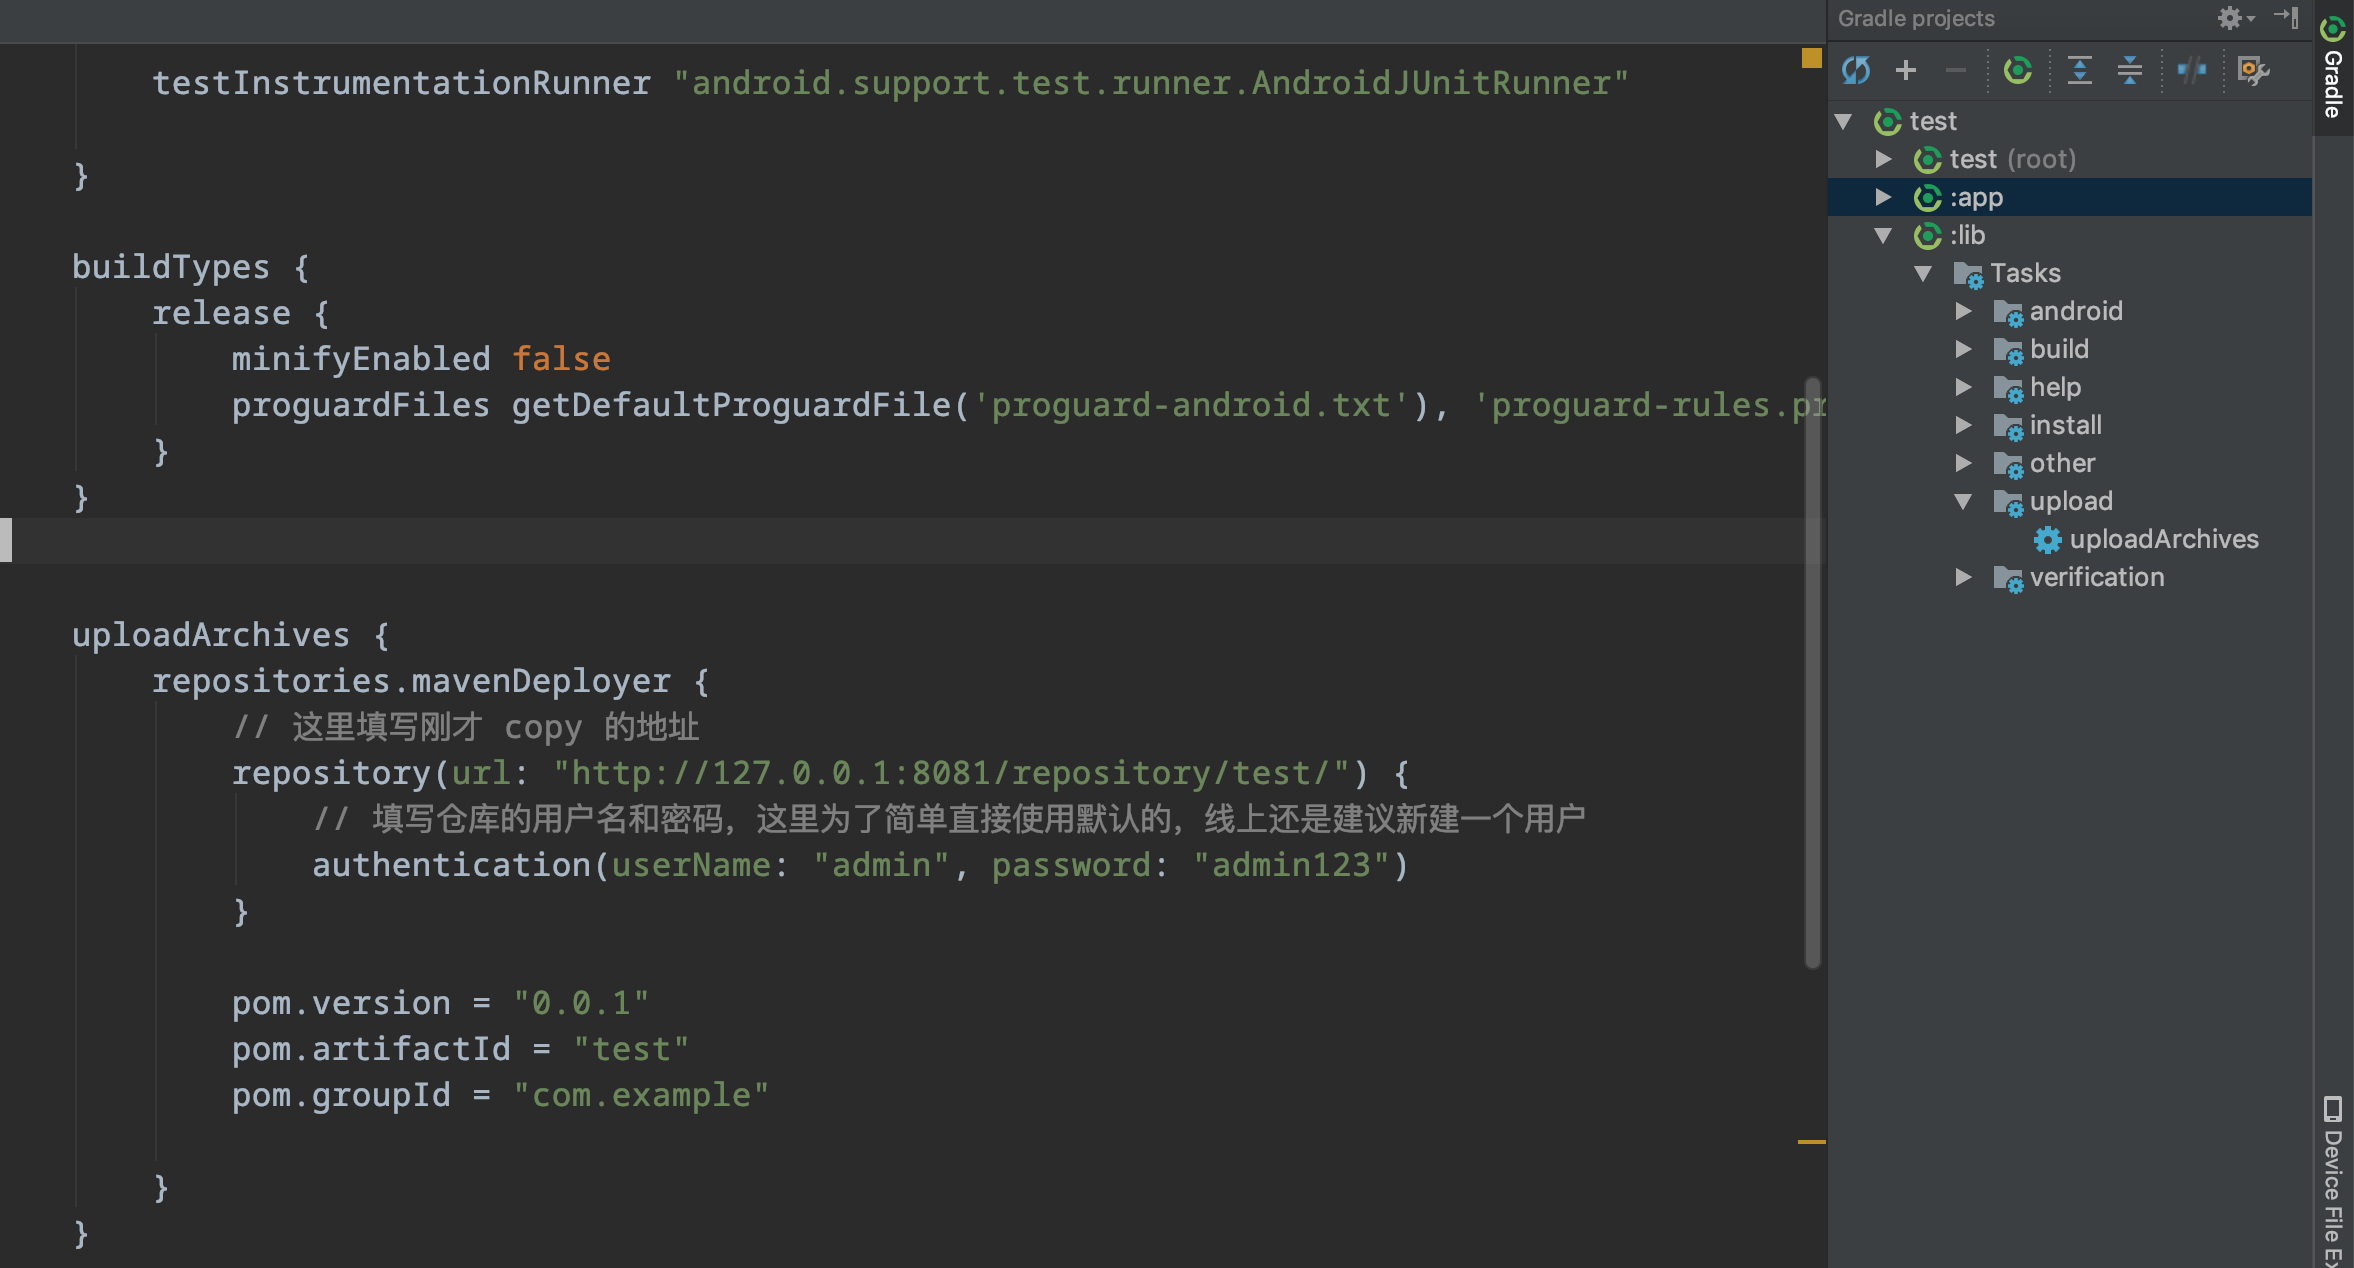
编写上传 gradle
在要上传的 module 的 build.gradle 下增加上传的脚本
 1
 2
 3
 4
 5
 6
 7
 8
 9
10
11
12
13
14
15
16
17
18
19
20
21
22
23
24
|
apply plugin: 'com.android.library'
// 要使用 maven 插件
apply plugin: 'maven'

android {

    ......

    uploadArchives {
        repositories.mavenDeployer {
            // 这里填写刚才 copy 的地址
            repository(url: "http://127.0.0.1:8081/repository/test/") {
                // 填写仓库的用户名和密码,这里为了简单直接使用默认的,线上还是建议新建一个用户
                authentication(userName: "admin", password: "admin123")
            }

            pom.version = "0.0.1"
            pom.artifactId = "test"
            pom.groupId = "com.example"

        }
    }

}
|
在项目中使用
在 Android 项目的 build.gradle 中配置仓库的地址
 1
 2
 3
 4
 5
 6
 7
 8
 9
10
11
12
13
14
15
16
17
18
19
20
21
22
23
24
25
|
buildscript {

    repositories {
        google()
        jcenter()
        maven {
            url 'http://127.0.0.1:8081/repository/test/'
        }
    }
    ......
}

allprojects {
    repositories {
        google()
        jcenter()
        maven {
            url 'http://127.0.0.1:8081/repository/test/'
        }
    }
}

task clean(type: Delete) {
    delete rootProject.buildDir
}
|
在 module 下的 build.gradle 添加依赖
1
2
3
4
5
6
7
8
|
apply plugin: 'com.android.application'

......

dependencies {
    ......
    implementation 'com.example:test:0.0.1'
}
|
创建仓库组
完成了上面的步骤,你应该已经使用上了 nexus3 ,但是在实际使用的时候碰到这样的情况:
公司里面的私有仓库中包含多个 library , 如果我们要同时使用这这些 library 的话,需要在项目的 build.gradle 加入如下配置
 1
 2
 3
 4
 5
 6
 7
 8
 9
10
11
12
13
14
15
16
17
18
19
20
21
22
23
24
25
26
27
28
29
30
31
|
buildscript {

    repositories {
        google()
        jcenter()
        maven {
            url 'http://127.0.0.1:8081/repository/test1/'
        }
        maven {
            url 'http://127.0.0.1:8081/repository/test2/'
        }
    }
    ......
}

allprojects {
    repositories {
        google()
        jcenter()
        maven {
            url 'http://127.0.0.1:8081/repository/test1/'
        }
        maven {
            url 'http://127.0.0.1:8081/repository/test2/'
        }
    }
}

task clean(type: Delete) {
    delete rootProject.buildDir
}
|
从上可以看出每个仓库都要进行配置,少的话还能写一下,多的话得累死。
上面的问题是有解决办法的,就是创建一个仓库组,把需要用的 library 都加进这个仓库中,这样里面的仓库都能用,只需要配置一次
下面来操作一下
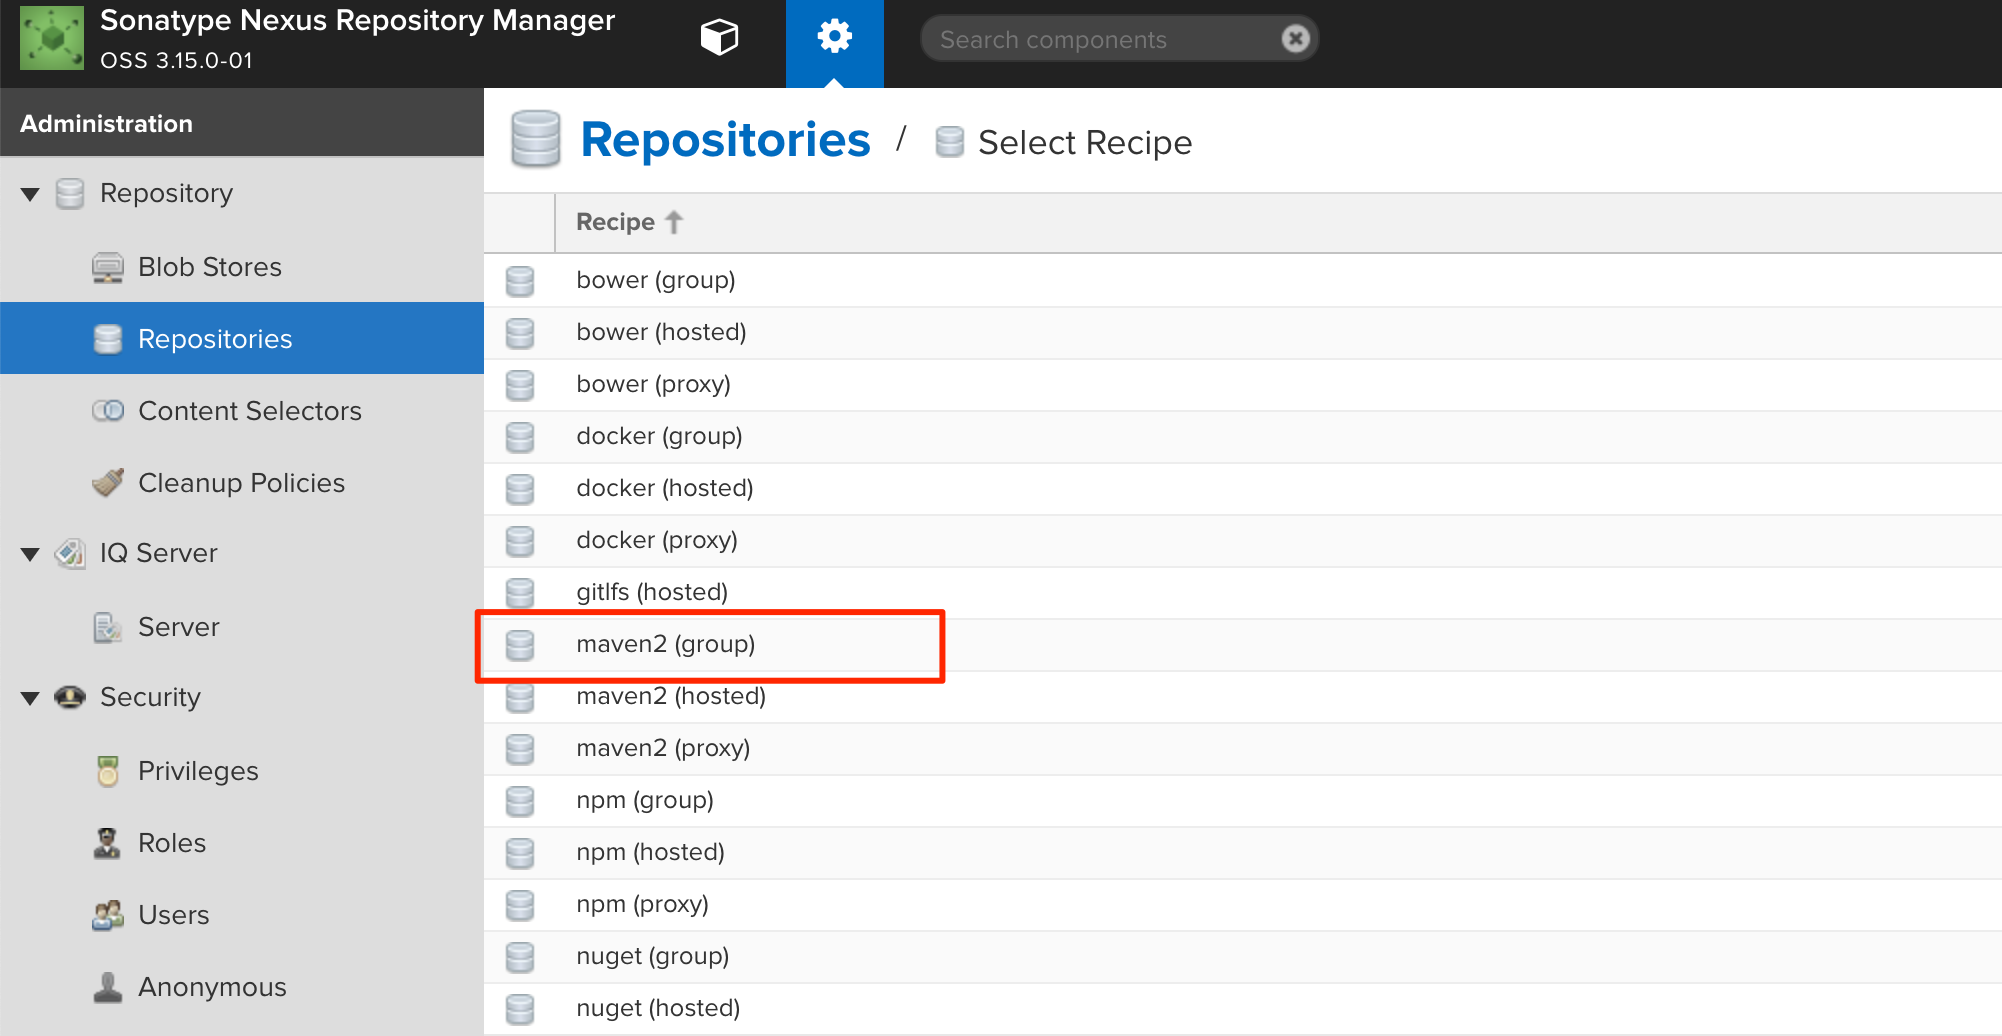
在创建仓库的地方创建一个仓库组,所以这里选择 maven2(group)
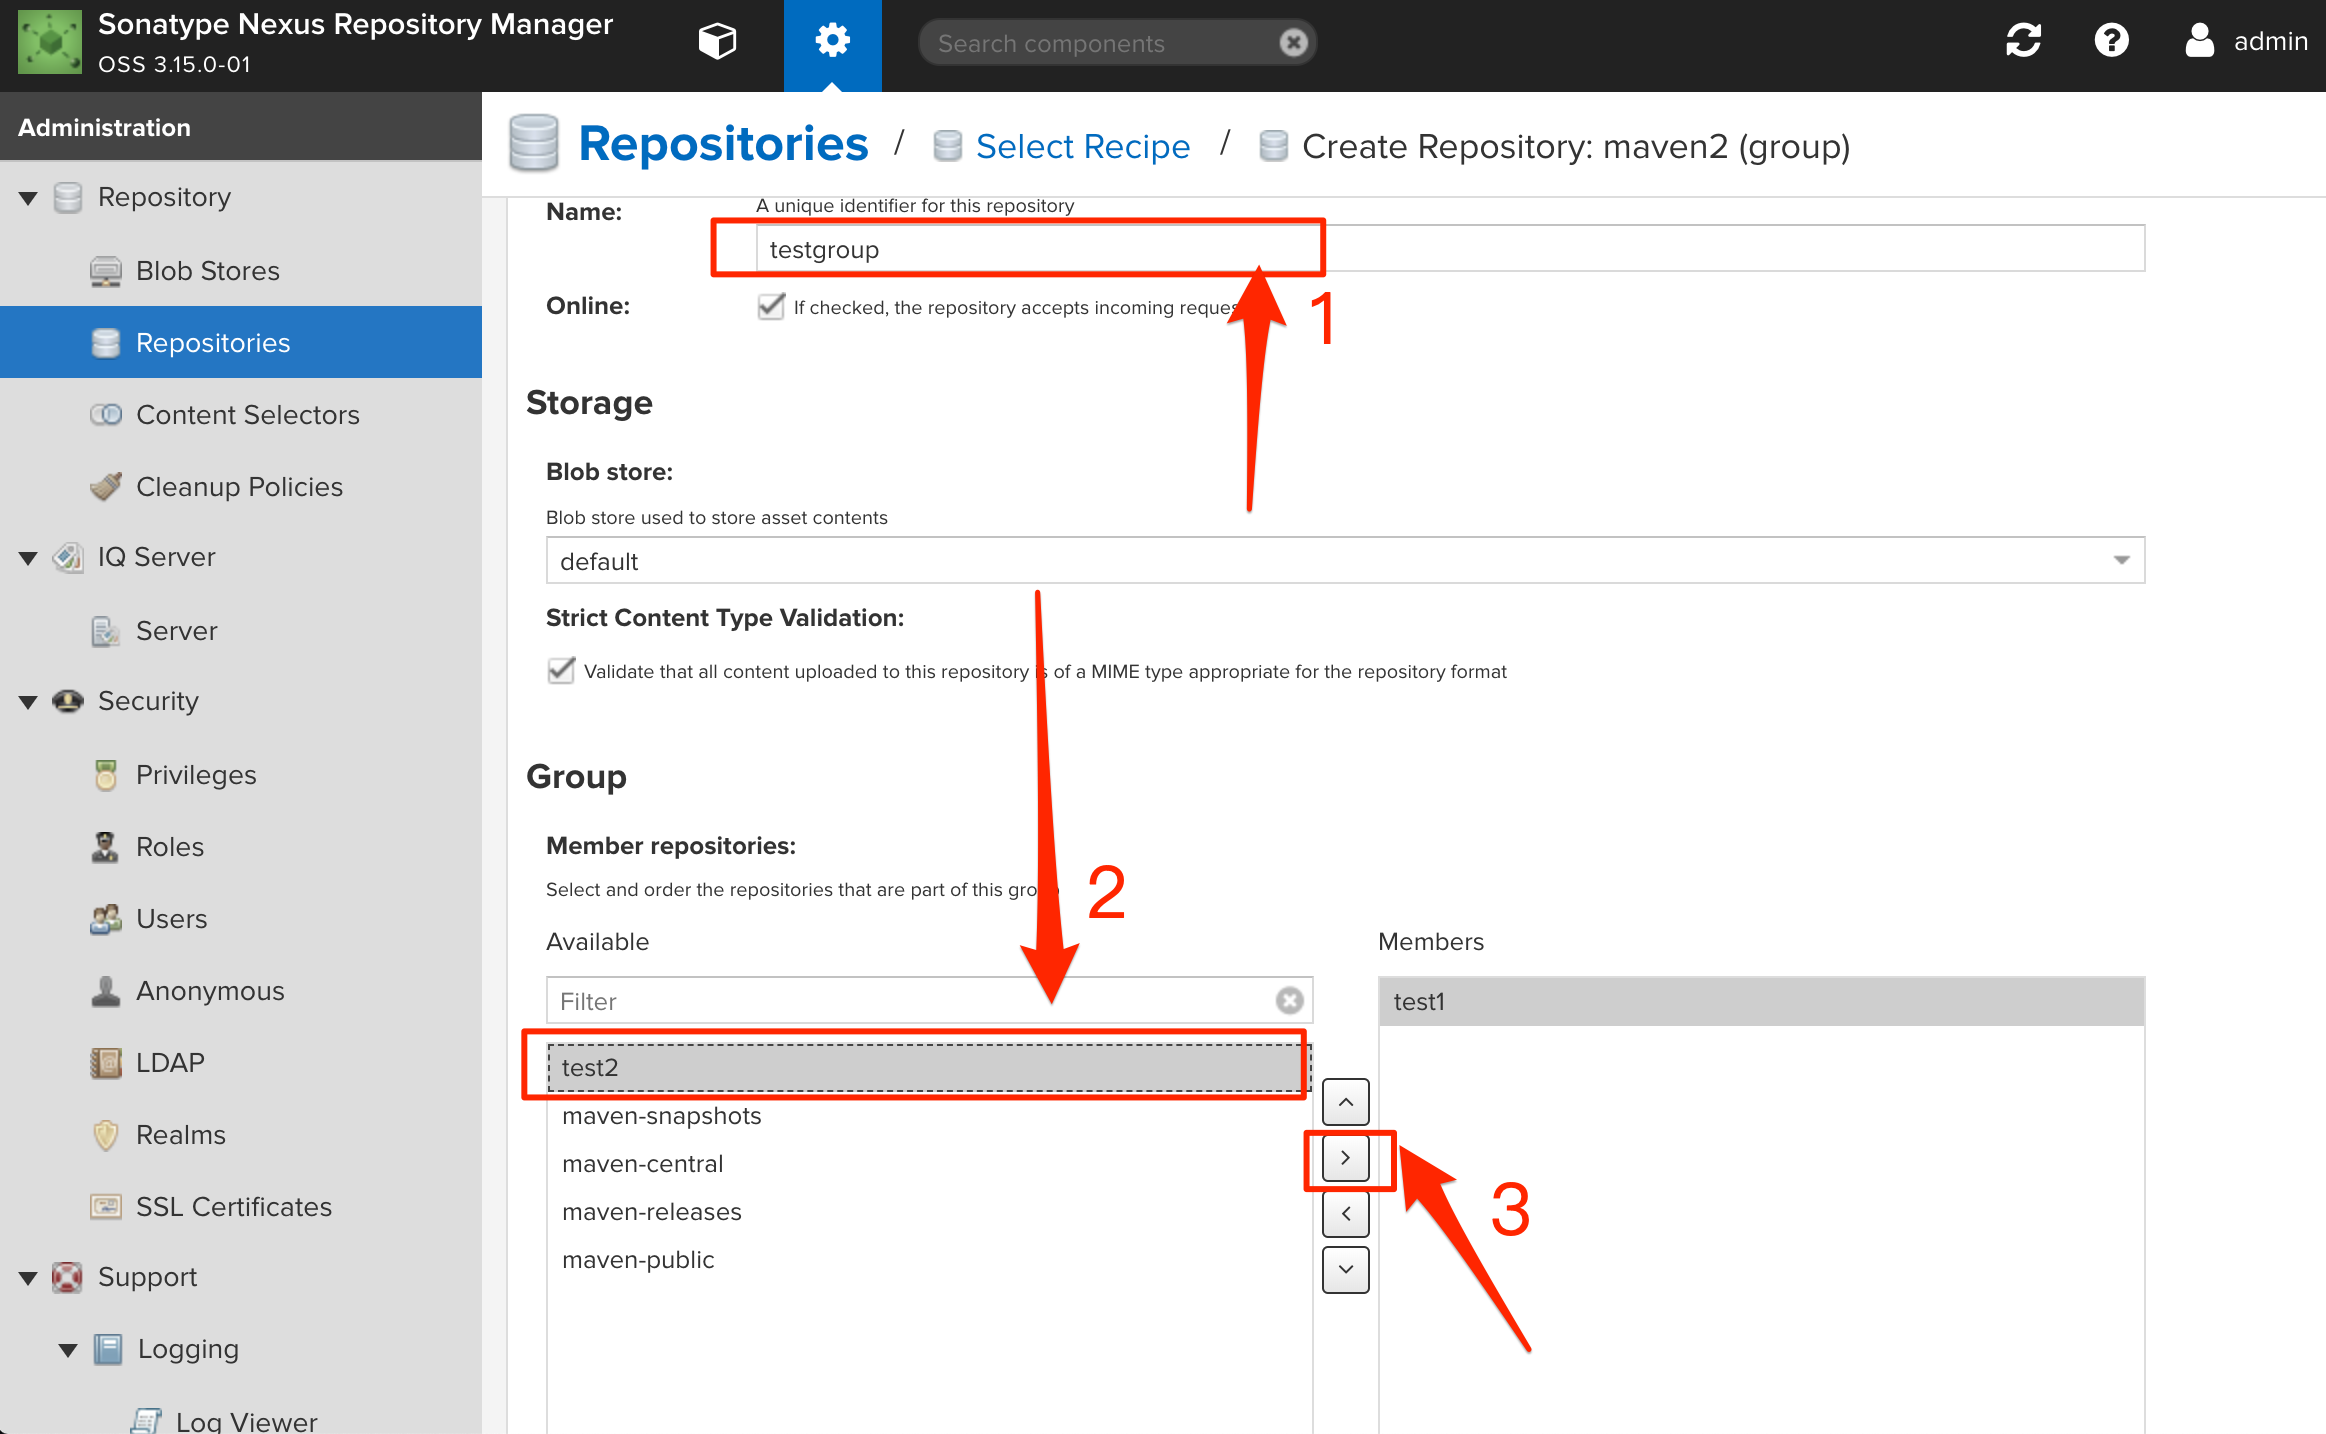
 给仓库取个名字,这里是
 testgroup ,然后在 Member repositories>Available 中选择需要加入的 library ,选中的会在右边的 Members 中显示。选好之后点击 Create repository 。
做好这些之后,你就可以在项目中配置一次,就可以使用里面包含的 library
 1
 2
 3
 4
 5
 6
 7
 8
 9
10
11
12
13
14
15
16
17
18
19
20
21
22
23
24
25
|
buildscript {

    repositories {
        google()
        jcenter()
        maven {
            url 'http://127.0.0.1:8081/repository/testgroup/'
        }
    }
    ......
}

allprojects {
    repositories {
        google()
        jcenter()
        maven {
            url 'http://127.0.0.1:8081/repository/testgroup/'
        }
    }
}

task clean(type: Delete) {
    delete rootProject.buildDir
}
|